Projects
Magnets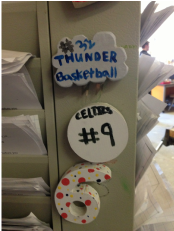
Top= Mine
Middle= Jill's Last= Megan's |
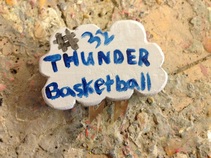
My Magnet
|
Magnet's
The assignment was to create a wooden or styrofoam block and cut out something that you chose. The input factors that we needed were the knowledge of how to use the ban saw and sander. The research we did is looked around the class at previous students magnets as examples to help brain storm ideas for our magnets. The final product was a smooth finished and painted block with a magnet glued to the back. Jillian Berube and my other peers thought my magnet was creative with the lightning bolts. I wasn't sure weather or not to make the cloud white or gray and my peers were helpful to me in making my decision. I learned that sheet metal can be used as a good decoration. I can use my magnet outside of school as an actual magnet. If i did the project again I would probably do the lighting bolts again so there bigger and more proportional to the cloud.
Steps
1.The first step was to draw several ideas for possible magnets
2.The second step was to pick your favorite design that you would actually be creating
3.The third step was to decide what material/materials you would make your block for the magnet out of
4.The fourth step was to actually cut out the block for the magnet
5.The fifth step was to sand the piece you cut out for your magnet
6.The sixth step was too paint the block for your magnet
7.The seventh step was to glue the magnet onto the back of the block
Rubik's Cubes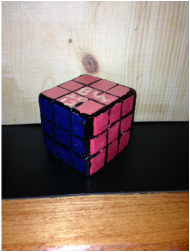
My Rubik's Cube
|
Rubiks cube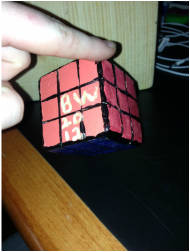
My Rubik's Cube
|
Rubik's cube
The assignment was to create a cube, made out of wood, that looked like a rubik's cube. Before we could start the project, we needed to know the demensions of the rubik's cube. The final product is a wooden block that is painted like a rubik's cube. My peers Jillian Berube and Megan were very supportive durring this journey, encouraging me and suggesting how to engrave my initials. My peer Nick White was not supportive at all, infact he told me several times that my cube looked awful. Mr. Ramos was helpful in suggesting how to make the gridlines on the side of the cube. I learned how to draw an isometric and oblique drawing. I learned how to use the bansaw. I can use my knowledge of the bansaw in the future on other assignments in engineering design. If I were to do this project again, I would engrave my initials before I painted.
Steps
1. The first step was drawing isometric and oblique drawings.
2. The second step was to cut three peices of wood with the demensions of the rubik's cube.(sqaures)
3. The third step is to glue the three pieces together.
4. The fourth step is to use the dremel to carve grid patterns on the sides so there are 9 sqaures on each side.
5. The fifth step is to paint the six sides, six different colors of a rubik's cube.
6. The sixth step is to engrave your initials on your cube.
Hydroponic Tomatos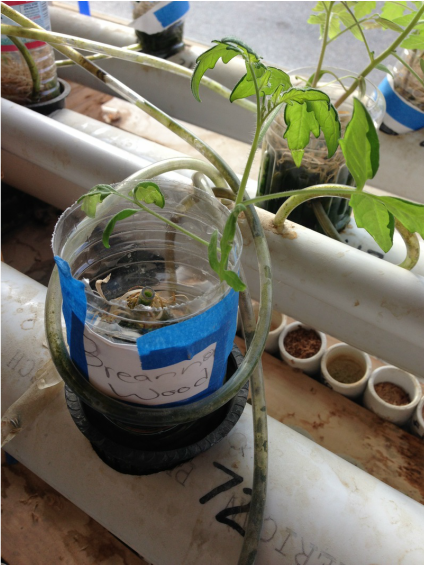
|
|
Hydroponics
The assignment was to create a water bottle to hold a hydroponics tomato plant. The input factors were you had to know how to use the ban saw, the drill press, and a cheese grater. The final product is full grown tomato plants. The feed back I received from my peers is that I should've put the two seeds lower in the wood shaving soil and that I should've picked a different spot to grow my plant. I learned that you can grow plants without dirt, with alternative soil and water. I could use what I've learned in the real world if I ever grow my own hydroponic plants. If I did the project again, I would put my plant in a different spot so it could get more sunlight.
Steps
1. The first step was to bring a plastic water bottle to school
2. The second step was to cut the top off of the water bottle
3. The third step was to use the drill press to drill holes for the tubes that carry the water to water your plant
4. The fourth step was to pick a location for your plant to grow and put your bottle in the spot
5. The fifth step was to put the tubes threw the bottle to water the plant
6. The sixth step is to watch and wait for your plant to grow
